
You can certainly hone your own cylinders, but this is more of a skilled craft than simple manual labor. If you just want to "remove rust" from the cylinder surface or create a nice crosshatch pattern, you can do it yourself in your garage with the right tools; however, if you want to change the cylinder size, it's safer to leave it to professionals.
Here are some tips for DIY cylinder honing:
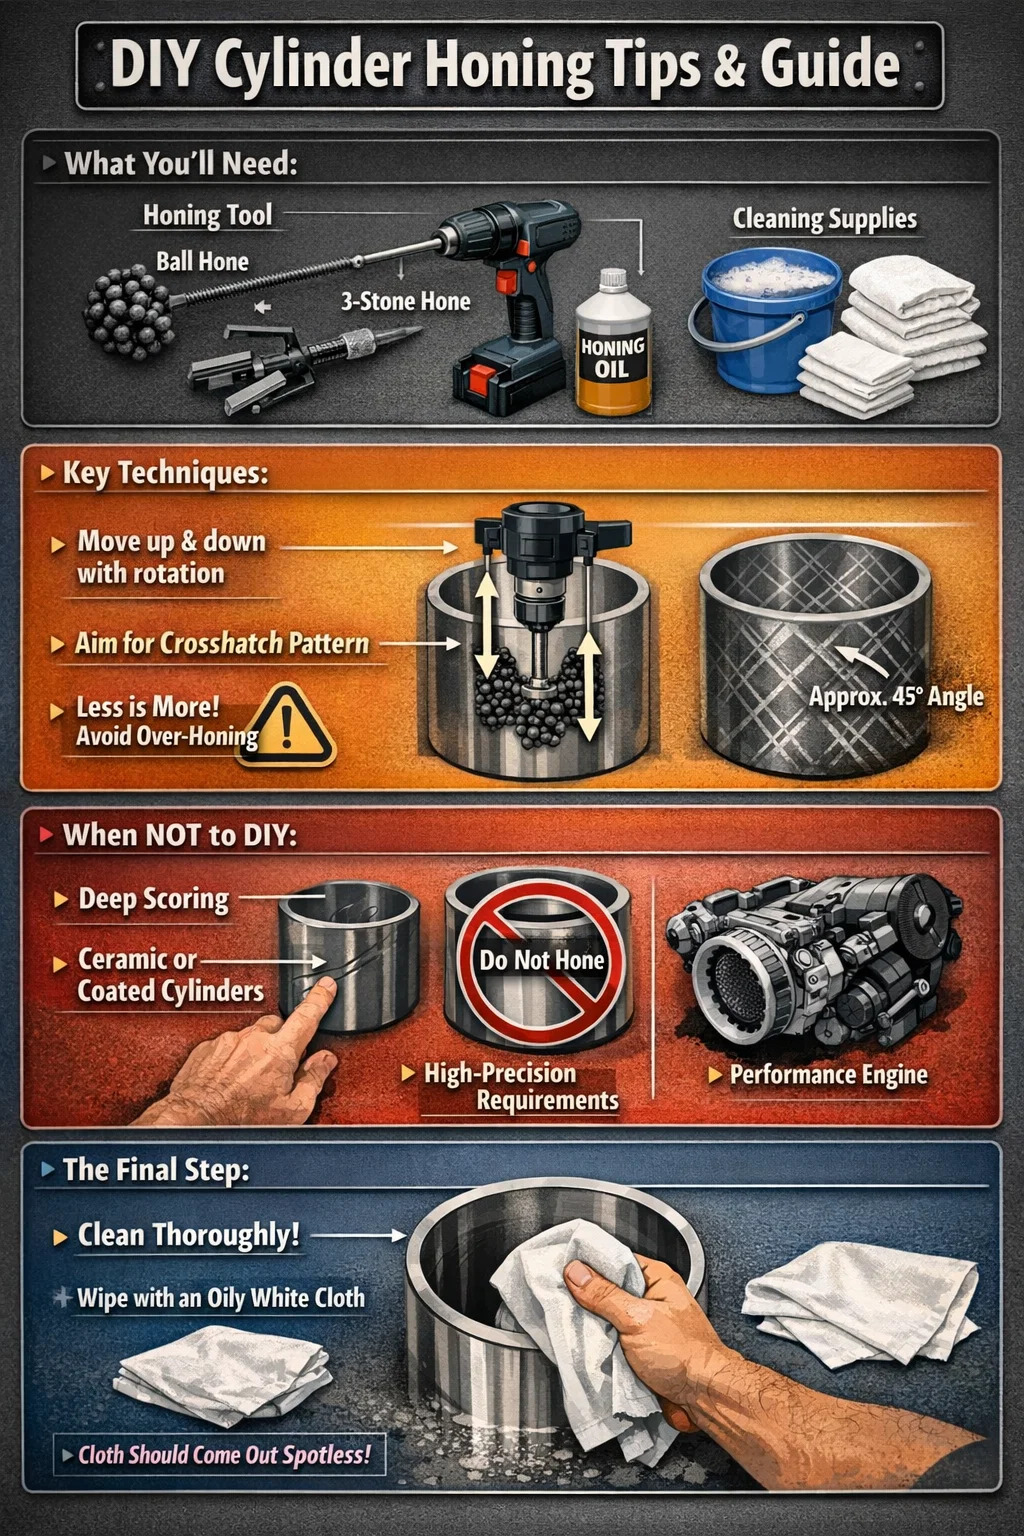
→ What you'll need:
Honing tools: The most common are ball-shaped honing heads that look like "dish brushes," or expandable honing tools with three abrasive stones. These can be used directly with a standard electric drill.
Lubricant: Never "dry hone." You need plenty of cutting oil or specialized honing oil. If necessary, clean engine oil will suffice. The purpose is to carry away metal shavings and prevent overheating.
Cleaning supplies: Cleaning after honing is crucial. You'll need warm soapy water and plenty of clean white rags.
→ Key techniques:
Control your technique and rhythm: Honing isn't about drilling in one spot. You need to move the drill with the honing head rapidly up and down inside the motorcycle cylinder while maintaining rotation.
Aim for a "crosshatch pattern": If you do it correctly, fine lines will form on the cylinder wall at approximately 45-degree angles. These lines act like small grooves, holding the engine oil, which is crucial for ensuring the new piston rings mate perfectly with the cylinder.
Less is more: The main purpose of DIY honing is to "clean the surface," not to "enlarge the bore." If you hone for too long, the cylinder may become oversized or oval, leading to leaks and oil burning later.
→ When should you absolutely NOT do it yourself?
Deep scoring: If you can feel noticeable deep grooves with your fingernail, this kind of deep damage cannot be smoothed out by manual honing. It must be sent to a machine shop for professional "cylinder boring."
Ceramic or special coated cylinders: Many modern high-end motorcycle cylinders have a very hard electroplated coating on the inner wall. This type of cylinder is very delicate; ordinary grinding stones simply won't work and may even cause the coating to crack. This kind of work must be entrusted to a specialized repair center.
The precision requirements are extremely high: if you are assembling a competition-grade engine that demands extreme performance, those micron-level clearance errors cannot be controlled manually.
→ The most easily overlooked final step:
After grinding, a large amount of microscopic abrasive particles and metal powder will remain on the cylinder wall. If these are not thoroughly cleaned before assembly, these powders will act like sandpaper and quickly destroy your new piston rings.
Standard test: Wipe the cylinder wall with a white cloth dipped in oil until the cloth comes out as clean as it went in. Only then is it considered thoroughly cleaned.
 آلیاژ آلومینیوم برای قطعات موتور یاماها")

")
.")
 سیلندر موتور موتور سیکلت آلومینیومی یاماها با کارایی بالا")
 اجزای موتورسیکلت آلیاژ آلومینیوم یاماها")
.")
 سیلندر آلومینیومی موتور آب خنک یاماها")
